Unless you're attending a special zoo event or education class that allows you to get up close and personal with the animals, you should expect to be at least five feet (and probably much further) away. Shooting from a distance comes with the territory when it comes to zoos; in fact, many of the photos you see here were taken from public access areas. Our recommendation for a basic two-lens kit would be the zooms we use the most: a 24-70mm and a 70-200mm. The 24-70mm lens will allow you to include some of the animal's natural environment, while the 70-200mm VR lens will give you some extra reach. In addition to the 70-200mm zoom, we use a 1.4X teleconverter and will occasionally carry an 80-400mm to extend my reach.
We prefer shooting at wider apertures (f/2.8 to f/5.6) because they provide a shallow depth of field that blurs distracting backgrounds as well as fence wire borders. A shallow depth of field isolates the animals while directing the viewer's attention where we want it.
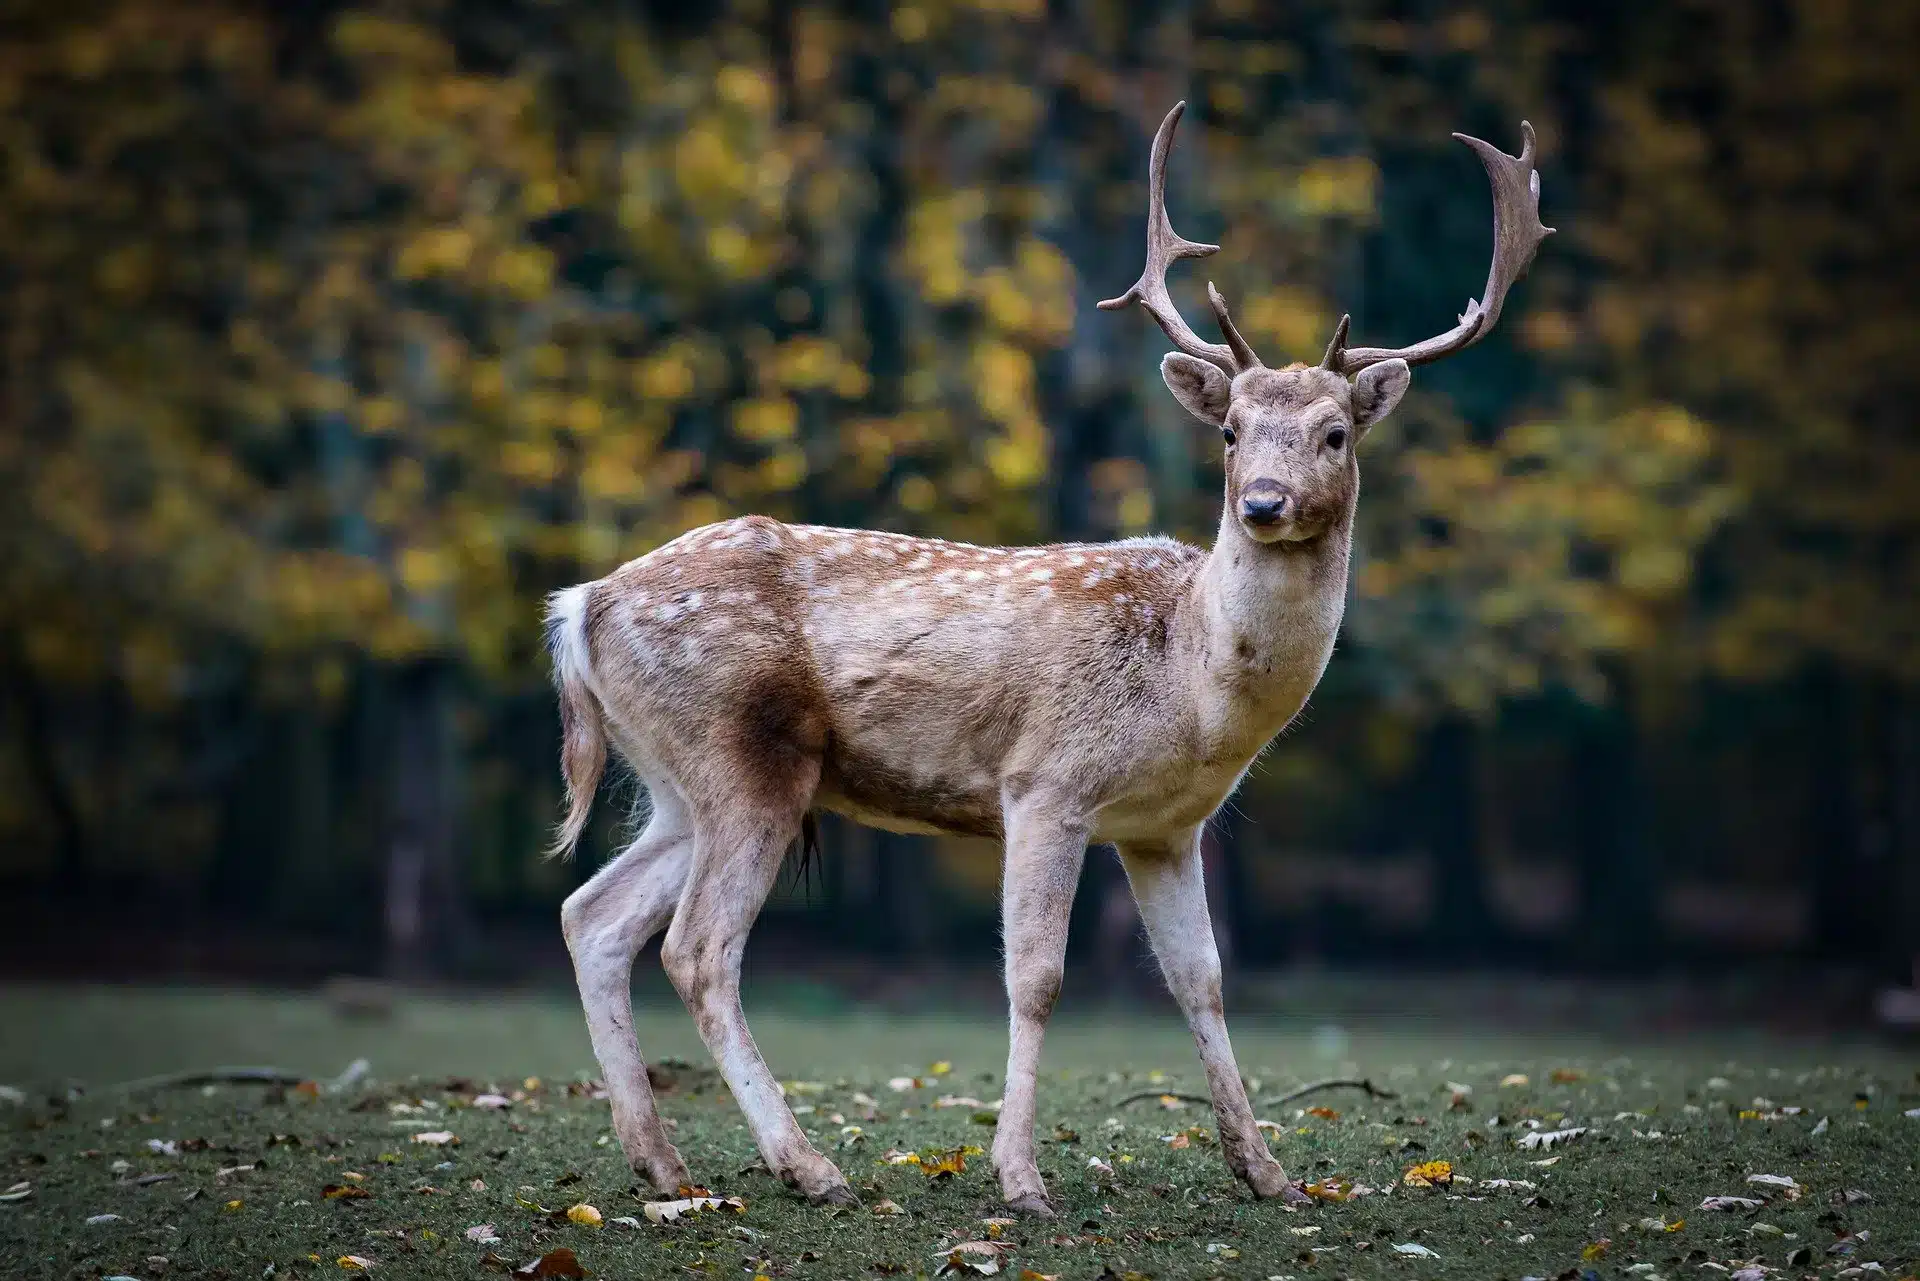
You don't have to be very close to a fence or safety netting when shooting through it; three feet should suffice. We should avoid going right up against fences because it scares the animals. It's also critical that the animal is a safe distance away from the fence: eight to ten feet is ideal.
What about flash? Examine the zoo's rules and exhibit list. Using flash in nocturnal animal exhibits or habitats is not a good idea (and is probably illegal). The goal is to never bother or upset the animals.
• It is usually the exhibit, not the animals, that makes flash difficult. It's a problem if there's glass. With a compact camera or a DSLR's built-in flash, we would recommend turning it off and increasing the ISO. If using flash is the only way to get an acceptable exposure, try standing at a 45-degree angle to the glass...then vary that angle and compare your results. With a Nikon Speedlight on your camera, you'll get the best results; you can tilt the flash head up to vary the angle, or you can bounce the light off the white card that comes with every Speedlight. Mirrorless cameras use the same techniques as DSLRs. Shoot a few frames, then check the LCD to see if you need to make any adjustments.
• We should frequently set the camera to Program and then use exposure compensation or change the ISO as needed. When we want a blurred background, we set the camera to aperture priority and select an aperture between f/2.8 and f/5.6. we began our career with a COOLPIX and was able to accomplish amazing things with it, including being featured on the cover of an annual report.
• Learn about your local zoo. You'll want to know about photo opportunities that put you face to face with the animals. On zoo websites and maps, new births, programmes, and events are listed.
• When it comes to light, timing is everything. Try not to shoot on very bright sunny days; overcast days, as well as "off weather" days, are ideal for zoo photography because many animals thrive when it's snowy or rainy, even if people don't. In addition, fewer people will attend on a bad weather day (avoiding crowds is always a good tip for zoo photography, so think early morning or late afternoon). Consider the animals that enjoy the snow, such as snow leopards, polar bears, tigers, and snowy owls.
• Make use of the zoo's website. You can view maps of the layout, learn about special events and educational programmes, and review the photography rules and regulations. And one more thing: find out when the animals feed. Animals know when it's time to eat, and they're especially attentive during that time. Sea lions stand to attention, and other animals awaken and gather around the feeding areas. Feeding time is a time for animal activity.
• Recognize that your first visit to the zoo may not yield the best results. First-timers should be exploring, learning where things are, and deciding what they want to see and shoot. We recommend doing recon before bringing all of your equipment. The more you know about your zoo and are familiar with it, the better you will be able to plan your shoot. Purchasing a membership is a good idea because it allows for unlimited access. Members will not have to work the entire zoo in one day; instead, they can choose a section and work it, then return and do the same for another section.
• Take a photo of the signage as the first or last image when photographing an exhibit. The signs usually include information about the animals, as well as a conservation tip. Later on, you'll be able to identify what you photographed for captions or for your own records. It will help you organise your shots and teach you about the animals and their surroundings so you can talk about them.
• Make a plan; be patient and wait for the right moment; practise at home with your pets and nature in your backyard; and embrace your passion for photography.


